First, choose a piece and then make the required cuts to carve a face in wood. The expert will guide you through the process using a step-by, video tutorial. You will be able to carve the face more realistically by using the progressive cut. The key to creating a lifelike visage is the progression of your noses on the piece of wood. You can add realistic details to your face by using colored dyes or shellac.
Hardwoods
When carving a face in wood, you must first consider the type of wood to be used. Hardwoods can be described as a group of trees with large leaves that can thrive in many climate zones. Hardwoods are ideal for many purposes, such as furniture building and furniture making, due to their large range in density, strength, and appearance. Hardwoods can be more cost-effective than softwoods but are durable and fire-resistant.
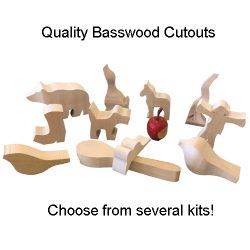
Softwoods such as butternut or basswood are good options for beginners to wood carving. These woods can be easier to work in and are a great choice for beginners. You should keep in mind that soft woods will not have the same quality or finish as hardwoods. It is important to try different wood types before you settle on one.
Softwoods
First, choose the type of softwood you want to use when carving a wood face. Softwoods are harder to carve and can often be knotted. They can also be more fragile if you use long strokes. The smallest pieces of wood will be cut by a beginner carver, which reduces the amount of detail. While this isn't a major issue, it is something to be aware of.
Some hardwoods are easier to work with than others. Aspen, butternut and basswood are some of the most easy to work with. It is recommended to use knives with a higher bevel. Softwoods can be worked with more easily than hardwoods. They can be cut along or across their grain. The wood that you use for carving will determine the quality of the finished product.
Colored dyes
You can create a bright, detailed finish to a wood carving by using colored dyes. You can find these in a wide variety of colors and mix them with water or alcohol to create a unique colour. Colored dyes can be mixed with shellac for lighter woods. After applying dyes, ventilate your work area and clean your brushes with denatured alcohol. Another option is paste wax. You should be aware that excessive glossiness can distract from your work. Use 0000 steelwool to get rid of any excess glossiness.
Wood dyes come in many varieties and are easy to use. Wood dyes will work with all topcoats. They are also easy to apply. They also solve common finishing problems. Because they come in a wide array of primary colors, they're easy to mix and apply. They're also available in a variety of shades and can be mixed according to individual preference. You can mix them to make unique colors.
Shellac
Shellac should be available before you apply it to your wood carvings. A jar of shellac is available, but the best way to apply it to your wood carving is with a brush. Two-pound cuts will suffice. This is because it will build up slowly and will reduce brush marks. Also, it's better to buy a thicker cut than a thinner one, because shellac is very water-thin. Make a pad from small, golf-ball-sized pieces of cotton and lint-free cloth to ensure you get the correct amount. Now dip your brush in the Shellac.
Shellac can be used for accenting grain or adding color. Shellac comes with a wide range of colors. You can mix different shades to make your own custom blends. You can even darken the shade by applying extra coats of the lac. Shellac is not like other wood finishes. It won't become yellowed or cloudy over time. Shellac is also more durable, which means you can make even more faces. You can do this with almost any type of woodcarving project.
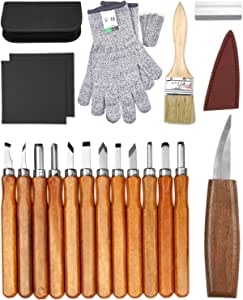
Gouges
There are many different sizes and shapes available for gouges. The most common types of gouges are the straight and palm gouges. Straight gouges can only be held with one hand. Palm gouges, on the other hand, have shorter shafts. Handheld carving becomes easier thanks to the shorter handles. The palm gouges, also known as veiners, are great for carving wood faces. Before you start carving, there are some things that you need to know.
The first step is to know how you can choose the right gouge. You need a gouge that can carve a shallow groove. Use a sharp, narrow edged tool. Gouges can be categorized by their size. A 3/10 size gouge can make the same cut as a 5-/10 size gouge. As the first number increases, the scoop between the edges becomes deeper and the sweep gets progressively more curved. A gouge with a small sweep will be able to carve a shallow v-shaped profile.
FAQ
What furniture can I refinish?
Yes! There are many different ways to refinish older furniture without the need for professional help. Here are some suggestions:
Use sandpaper to remove scratches and stains. After that, use a clean towel to wipe the surface.
Use clear polyurethane varnish. Allow furniture to dry completely before you move it around.
Acrylic paint is a great way to paint furniture.
Use stain instead of paint. The furniture will have a rich look thanks to the stain.
Use shellac wax. Applying wax will give the wood shine and protection.
What type of tools does a carpenter use?
A hammer is the most commonly used tool by carpenters. The hammer is used to pound nails into wood. It also helps them hold pieces together while they are working on a project. Other tools include clamps. pliers. screwdrivers. measuring tape. pencils. saws. drills. wrenches.
Is it necessary to be a genius in woodworking to succeed?
No. Woodworking is not rocket science. You can create beautiful pieces of art by learning how to use simple power tools.
Is there a way to start my own woodworking company?
It's not easy to start your own woodworking business. There are many regulations and legal requirements that you will need to comply with. This doesn't necessarily mean that you should go through all the work of setting up a company. Many people opt to join existing businesses instead. This will allow you to avoid paying membership fees and taxes.
What are the basics of woodworking?
It is an excellent way to learn how to build furniture. You can make a simple bench yourself. This project can easily be done using whatever wood you have at your house. If you're not sure which kind of wood to choose, you can purchase cheap pine boards at Lowes and Home Depot. Once you have built your bench, you will need to sand it off and then finish it with a stain/varnish.
Statistics
- In 2014, there were just over 237,000 jobs for all woodworkers, with other wood product manufacturing employing 23 percent; wood kitchen cabinets and countertop manufacturing employing 21 percent. (theartcareerproject.com)
- Woodworkers on the lower end of that spectrum, the bottom 10% to be exact, make roughly $24,000 a year, while the top 10% makes $108,000. (zippia.com)
- Most woodworkers agree that lumber moisture needs to be under 10% for building furniture. (woodandshop.com)
- Overall employment of woodworkers is projected to grow 8 percent from 2020 to 2030, about as fast as the average for all occupations. (bls.gov)
External Links
How To
How do I accurately measure wood?
Wood measurement can be done using several methods. We use a digital scale (a tool for measuring distances), a laser-level (used to level your work surface), as well as a bubble level (used in order to level your work surface).
Two jaws can be opened and closed on a digital caliper. One jaw holds a measured object and the other measures distances between the points. The digital calculator is ideal for measuring very small distances, like the thicknesses or wood.
Laser levels use an infrared beam of light to project a line across the ground. The laser emits red dots on the line. You can check if the surface is level by looking down at the line. For larger surfaces, laser leveling is the best method of checking accuracy.
Bubble levels look similar to a compass. The center of the device contains a bubble. As long as the bubble remains centered, the device can tell you if the surface has been leveled. Bubble levels can be used for checking the accuracy in smaller areas.