A beginner woodcarver might not know where to begin. Here are some tips and tricks to help you get started with your first animal carving job.
Dog
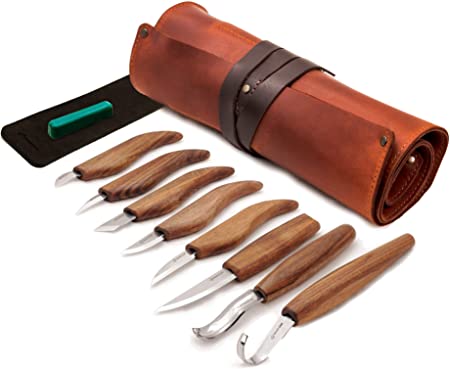
You can find many free patterns online for woodcarving dogs if you're an amateur. These patterns will guide your carving of your dog in a variety styles and dimensions. Here are some of the tools you will need to carve your dog. A band saw or copingsaw, chisels and a mallet are all you will need. You also need some time to sharpen them. Next, you will be ready for carving!
Eagle
The bald eagle is a traditional symbol of strength, courage, and wisdom to Native Americans. Its main purpose was to serve as the creator's messenger, measuring about 20 inches across and five inches wide. The eagle has become a very popular choice for wood carvings. There are many woods that can be used to carve eagles, including modern and antique. This article will show you some of the most common wood carving styles.
Bear
Carving a bear is simple and straightforward. Each line is heavier than the previous. The front paws of a bear are angled opposite the leg lines for added visual interest. You might consider buying a book that will teach you how to make a bear. James Miller's book illustrates the whole process.
Elephant
An elephant wood carving is a stunning way to add character to any home. 1stDibs has 56 antique carved wooden elephants and two modern pieces. These pieces are popular since the 19th century. You can choose from Art Deco (Mid-Century Modern), Folk Art, or a smaller piece for a subtle addition to your home decor.
Moose
A moose is a wonderful animal to wood carve, whether you are looking to add antlers and/or create a stunning moose head. Dowels can be used to attach moose paddles and antlers. They will need to be pushed into place and maybe glued. The moose can be painted with a walnut gel stain and/or colored with paint.
Template for moose
Carvers can use a moose carving template to help them create realistic-looking carvings. Moose carvings can be colored with paints and stained with walnut gel stain. After you've learned the basics it is simple to carve this creature. You can add details like fur or eyes with a brush, or a typhoon piece on a diegrinder. For beginners wood carvers looking to carve an animal, the Moose template will work well.
Bear template
You will need a template to start a bear wood carving. To explore the wood's features, you can use a Dremel to create a template. This tool allows you to use stop cuts in order to separate the legs from their lower bodies. To indicate where the legs will split, you could also make small V-cuts. Once you are done with the leg and ear sections, you can finish the underbelly. To continue shaping the bear, leave a space at the back.
Eagle template
Three templates are necessary to carve an Eagle. One template is needed for carving the eagle, while the other one will be used as a work paper template. This will allow you to cut out patterns and use the working paper. The third template serves as a guide. Then, you will use the tools available to cut out the main lines of the template. Make sure that you cut out the lines as close to the pattern line as possible. All marks should be aligned.
Template for mice
For those who are new to wood carving, there are many options. This task will be easier if you use a template. You can also download patterns to assist you. If you are a beginner, you can start with a simple pattern. Then you can move onto more complicated patterns as you progress. Once you have mastered the basics you will be able to create the perfect mouse.
FAQ
How much should a skilled woodworker earn per hour?
Hourly rates for professional woodworkers vary depending on many factors such as skill, experience, availability, geographical location, and other variables.
An average hourly rate for skilled woodworkers ranges between $20-$50.
A woodworker with less experience may be able to charge $10 an hour.
Do I have the potential to make a decent living doing this?
Yes! Many woodworkers are already doing so. According to the U.S. Bureau of Labor Statistics' (BLS), in May 2012 the median annual wage of woodworkers was $34,000 This is much higher than the national median of $31,000 per annum.
How long does a piece take to finish?
It depends on the type and complexity of your design as well as the amount of finishing that you use. Hardwoods require more care than softwoods. Hardwoods can also be more costly than softwoods. They last longer and are more resistant to moisture. It takes between one and three months to finish a piece.
How can you calculate the woodworking price?
The most important thing to remember when calculating costs for any project is to keep them as low as possible. Always make sure you get the best price on materials. It is important to take into consideration all factors that can impact the cost of your projects. These include time, skill and experience. Check out our guide on the average cost of common DIY projects to get an idea of how much you can spend on woodwork projects.
Statistics
- Average lumber prices rose about 600 percent between April 2020 and May 2021. (familyhandyman.com)
- The U.S. Bureau of Labor Statistics (BLS) estimates that the number of jobs for woodworkers will decline by 4% between 2019 and 2029. (indeed.com)
- If your lumber isn't as dry as you would like when you purchase it (over 22% in Glen Huey's opinion…probably over 10-15% in my opinion), then it's a good idea to let it acclimate to your workshop for a couple of weeks. (woodandshop.com)
- In 2014, there were just over 237,000 jobs for all woodworkers, with other wood product manufacturing employing 23 percent; wood kitchen cabinets and countertop manufacturing employing 21 percent. (theartcareerproject.com)
External Links
How To
How to make wooden joints
This tutorial will demonstrate how to join two pieces together of wood. We'll use the "pocket hole joint," which means we drill holes in the wood and then glue them together. If your wood is straight and flat, this method will work well. Try dowel joinery instead if your wood doesn't look straight. These are the steps
-
Drill Pocket Hole Joints. First, measure the area where you wish to place the pocket joint. Use a jigsaw or handheld drilling machine to drill 3/8 inch deep holes at the ends of each wood piece.
-
Sand Smooth. Sanding the wood's edges will help ensure that the joint won't split later.
-
Glue Together. Apply glue on both sides of the wooden plank. Allow the wood to rest for five minutes before clamping it together.
-
Secure the pieces together. After the glue has dried completely, you can clamp the pieces together until they are flush.
-
Trim Joinery. After the glue dries completely, trim off any excess wood around the joint.
Allow enough space between pieces so you can turn them inside out.