When setting up a band saw, it is important to ensure that the blade is properly tensioned. There are many things to consider when setting up a band saw. Your final cut will be affected by how it is set up. Follow these steps to setup a band saw and you will soon be cutting! Below are some tips to help maximize your bandsaw's potential. They are not easy to follow, but they will be worth it in time.
Set up a bandsaw using a tension gauge
A tension meter will allow you to adjust the tension of the bandsaw with the greatest accuracy and consistency. Read the manufacturer's instructions before you begin to cut wood. Some instructions might differ depending on the model of your saw. The tensionwheel should be turned down one quarter to one-half turn. After this is done, you can set the blade guides at their recommended FSR.
You can also deflect the bandsaw blade to check for tension. This will allow you to listen out for a clear tone. A tension meter, which is a highly accurate and costly tool, will enable you to adjust your blade tension to maximize blade life. A tension meter may cost $400 or more, but it is worth the price. If you're unsure whether you want to purchase a tensionmeter, you can always check the blade tension using a gauge.
To check the tension of your blades, use a gauge
When setting up a saw, it is crucial to use a gauge. All blades require equal tension to cut. The pulling force, generally between 200-800 pounds, will dictate the tension. A bandsaw's tension scale will give you an inaccurate reading if you don't use one. So, what can you do?
A bandsaw gauge is composed two stainless steel plates which pivot past each others and are connected using a tensioning Spring. One plate has a numeric scale while the other one has a pointer indicator. The gauge attaches to the blade using three pins. Two pins sit on either side of the blade and the third pin presses against the blade on the other.
How to track a blade
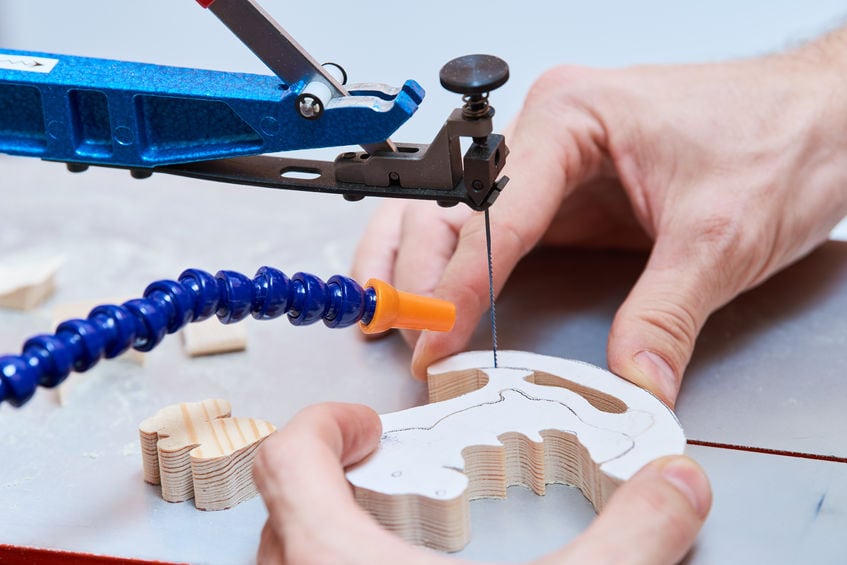
Quality cuts can only be achieved by proper blade setup. A successful cut requires proper blade tracking and height. Set the blade height at an appropriate level to allow approximately one-eighth to quarter-inch clearance from the material you are cutting. Too low or too high blade height will cause excessive vibration and friction and head off course when following a line. A tracking knob is a good option to help stabilize wobbling edges.
First, locate the blade. The blade should rest on the crown of a wheel, with its deepest part in the middle. Next, adjust tension to the blade. The tracking control is usually located at the back. This tension should be applied to the blade. After the blade has been placed correctly, lock the control. After you are happy with your position, you may begin cutting.
To reduce drift, use a long blade
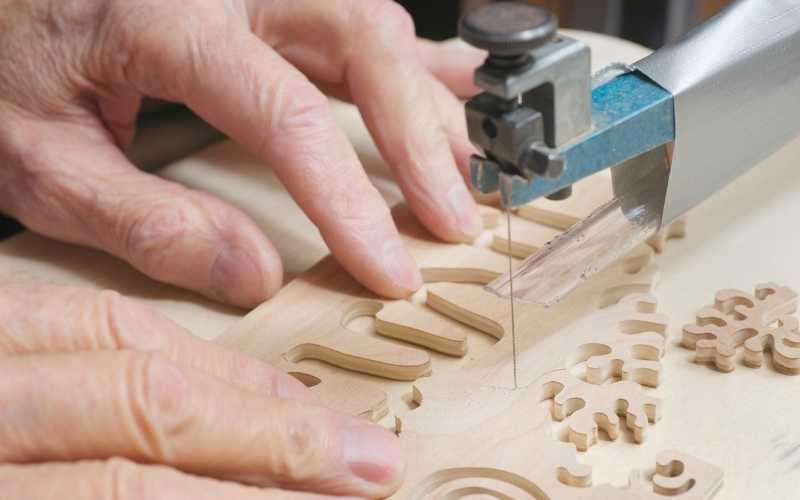
The long blade of a bandsaw should be placed near the crown. It should also not be too close or too far from the wheel's front or back edges. A typical blade will not be too far off center by about an eighth to quarter of an inch. However, if the blade is barely touching the wheel it may need some adjustments. Adjust the fence to correct this and tilt the upper wheels.
To account for drift in a bandsaw setup, it is best to use a longer blade with the same length as the blade you are using. This will help reduce drift (the material lost when a wood-cutter starts cutting lumber). You'll see how to correctly set the fence angle in the video. You can also duplicate the fence angle with a jig.
Use a fence to align your blade

To align the band saw blade, you can use a fence. Place the fence next to the fence so that the blade is parallel to it. Slide the fence over the miter slots until the fence's face is flush with it. To make sure the blade is correctly aligned, you can use your finger to push the fence over the miter slot.
Before you can adjust the fence, it is important to place the blade guides. Properly set up the bandsaw. A sharp blade is required to place the fence. Adjust the fence to correct any blade movement. To measure the drift angle you can use a jig and a bevelsquare. A video will show you how to do this. It is important to first identify which fence is causing drift.
FAQ
What tools should I start with when becoming a woodworker?
Woodworking takes practice and patience. It takes time and practice to master the various techniques and tools required for woodworking.
There are many options for woodworking equipment today. Some people prefer using power tools while others prefer hand tools.
The choice is yours, but you must ensure you choose the right tool for the job. You might start with a simple set of tools if you don't have much experience.
You might also consider learning how to use the router to create intricate shapes from wood. These are available at most hardware stores.
Where do you start when it comes to woodworking?
You can learn the most effective way to build furniture by actually building it. While you will need tools and make mistakes, you will eventually master the art of building furniture.
First, choose a project you would like to complete. It could be something as simple as a box or as elaborate as a full-scale entertainment center. Once you've decided on a project, find a local woodworker who specializes in that kind of work. Ask him or her for advice on what tools you'll need and where to find them. Ask if you can find someone who does this kind work.
How long does it take you to finish a piece?
It depends on the size and condition of the furniture. For smaller projects such as picture frames and boxes, it can take less than a day to complete. Larger projects like tables and desks take many days. It takes time in order to properly stain or seal the wood.
Where can I find free woodworking plans?
To find free woodworking plans, you don't have to buy any magazines or books. Search Google for free woodworking plans. Enter "free woodworking", and you will see hundreds upon hundreds of websites offering free plans.
Statistics
- Most woodworkers agree that lumber moisture needs to be under 10% for building furniture. (woodandshop.com)
- In 2014, there were just over 237,000 jobs for all woodworkers, with other wood product manufacturing employing 23 percent; wood kitchen cabinets and countertop manufacturing employing 21 percent. (theartcareerproject.com)
- Average lumber prices rose about 600 percent between April 2020 and May 2021. (familyhandyman.com)
- The U.S. Bureau of Labor Statistics (BLS) estimates that the number of jobs for woodworkers will decline by 4% between 2019 and 2029. (indeed.com)
External Links
How To
Here are some tips on how to drive nails in wood
When driving a nail into wood, it is important to first choose the correct size and kind of hammer. There are many types of hammers that you will find: claw hammers and sledgehammers; mallets; ball peen hammers; and hatchets. Each type has its strengths and weaknesses. A claw hammer works well when you're trying to hit nails with a heavy hammer. However it is difficult to precisely control where the blow hits. Although a sledgehammer can be used to hit large areas quickly, it is too heavy to be useful for small tasks.
After choosing the right hammer, place your hand flat against the side of the head so that the handle rests comfortably in your palm. Grip the handle firmly, but don't squeeze it so tightly that you hurt yourself. You should hold the hammer straight-up, with your wrist still relaxed. Now, move the hammer towards the center of the nail by swinging it back. The impact of the hammer hitting the nail should be felt. You can practice swinging the hammer with a block or wood until you feel the rhythm.
You can now drive the nail by holding the hammer to your body. Place the nail so that it is perpendicular with the wood's surface. Keep your eyes on the tip. Swing your hammer forward. Then follow through with the motions of the hammerhead. Repeat this action several times, gradually increasing the speed of the swing. Once you've mastered the technique, try adding power to your swings. To make it more powerful, hold the hammer up high to your shoulder and then bring it down. This will help you put more energy behind each of your moves.
Once you've made the first nail hole, take out the hammer. To pull out the remaining nails, use a screwdriver or pry bar. Keep the nails heads in line with the surface of the board to prevent splitting the wood.